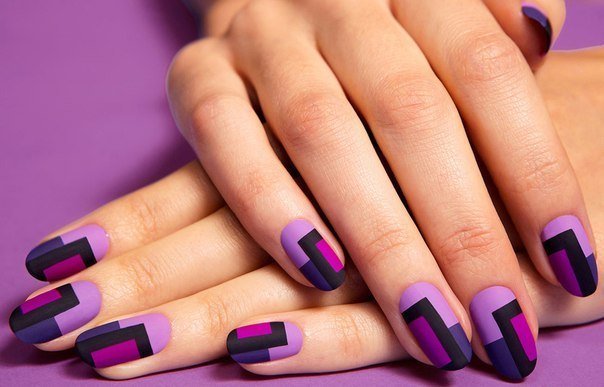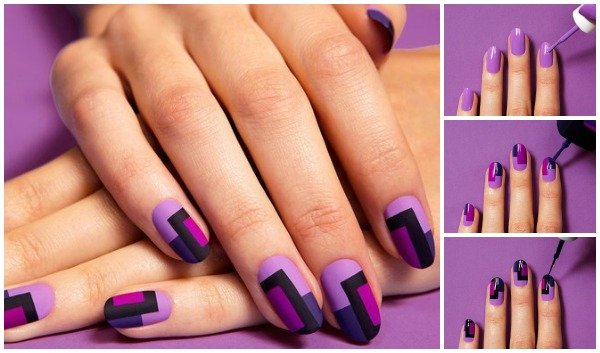
The retro pattern is a must-try for fall. The look is a graphic nod to mod, but the matte top coat makes it feel soft. Teenvogue shares this Poole and Groovy nail art with us which is reversible for us to apply other tones to make our fingers pop in all seasons.
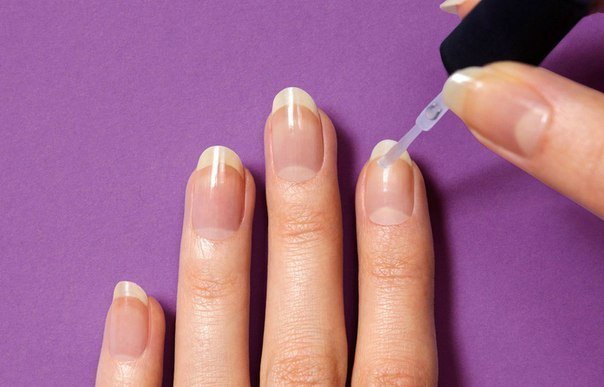
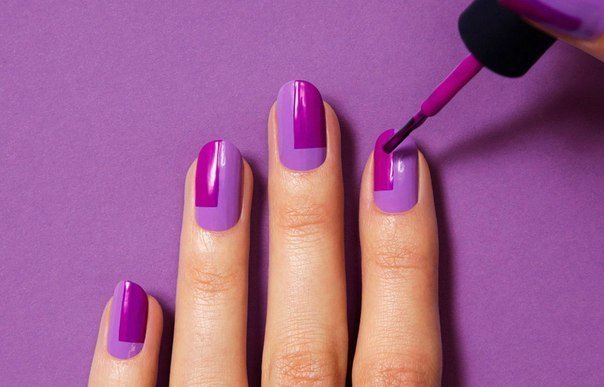
1. Apply a Base: Use a base coat to create a smooth, even surface for your nail polish.
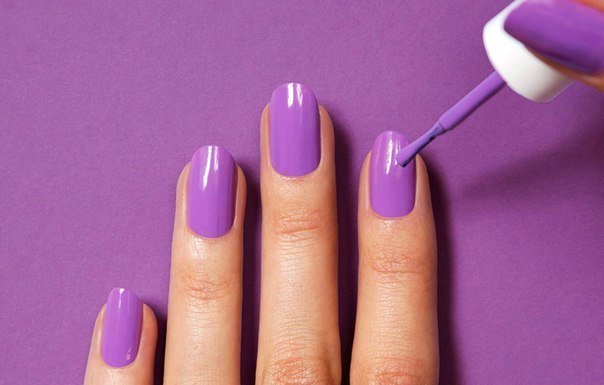
2. Start with Light Purple: Your lightest color goes on first. Apply two coats to really make it stand out.
3. Create a Rectangle: Using a single stroke of the brush from your polish bottle, draw a rectangular shape in the top right corner of your pinkie finger.
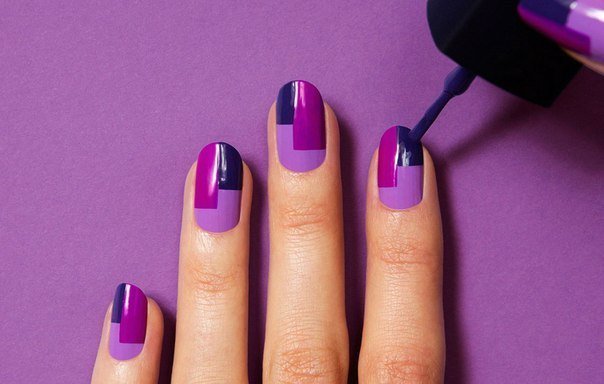
4. Add Dark Purple: Beginning at the tips on the side that doesn’t have already have a rectangle, use a dark purple polish to draw a similar shape that stops about halfway down the original.
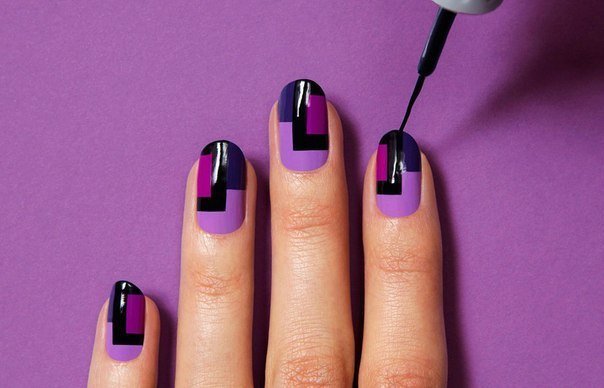
5. Incorporate Black Detailing: Using a black nail art brush, draw a border around the larger rectangle. This will hide any seams between your colors and really make the geometric pattern pop. If you want your lines to be super straight, you can wait until your purple polish is completely dry and use a piece of tape as your line guide.
6. Matte It Out: Use a matte top coat to give the look depth and texture.
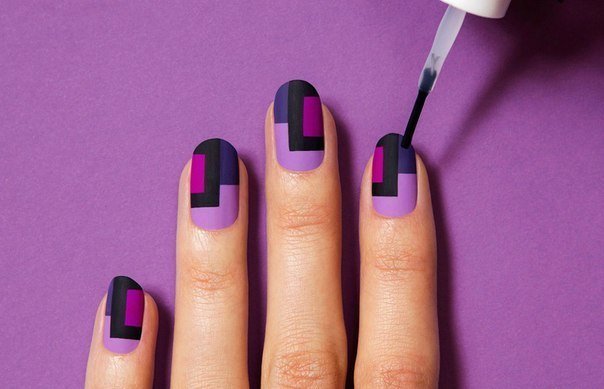
Voila.